
Appalachian Trail Gear List: Expert Guide (7 Essentials)
When I was first interested in thru-hiking the Appalachian Trail, I thought I had it all figured out. I wasn’t exactly brand new to backpacking at that point. I’d done hikes in New Mexico, the Great Smoky Mountains, various locations in the Great Lakes region, and abroad in New Zealand. But preparing for a journey of 2,000+ miles takes a different approach. Especially with gear. Here is my guide to crafting an Appalachian Trail gear list so you can start off on the right foot.
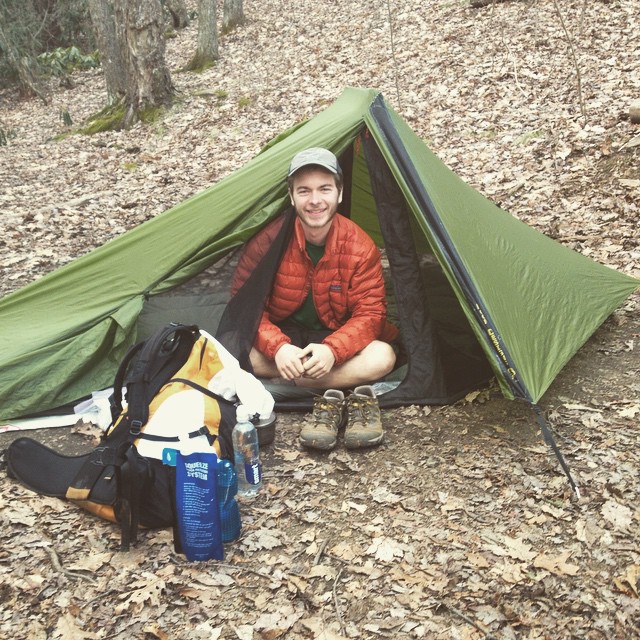
1. Backpack
For a beginner, I would aim for a backpack between 50 and 65 liters. I used the 54 liter ULA CDT. It served me very well. I had plenty of room for food, rain gear (which you will definitely want on the AT), and anything else I needed. It was also a wonderfully durable pack, which is important on such a rugged trail.

The backpack you choose should be dictated by the other gear you have chosen. I bought it last, since I knew what size I would need with all my gear loaded inside. Just make sure you have plenty of room for what you personally need.
I highly recommend finding a pack that is simple, durable, and without a bunch of extra pockets and compartments. This will simplify your life on the trail, and force you to be intentional with what you pack. You can also check out my post on how to choose a backpack.
Options to consider:
ULA Circuit
Granite Gear Crown 3 60
Gossamer Gear Mariposa
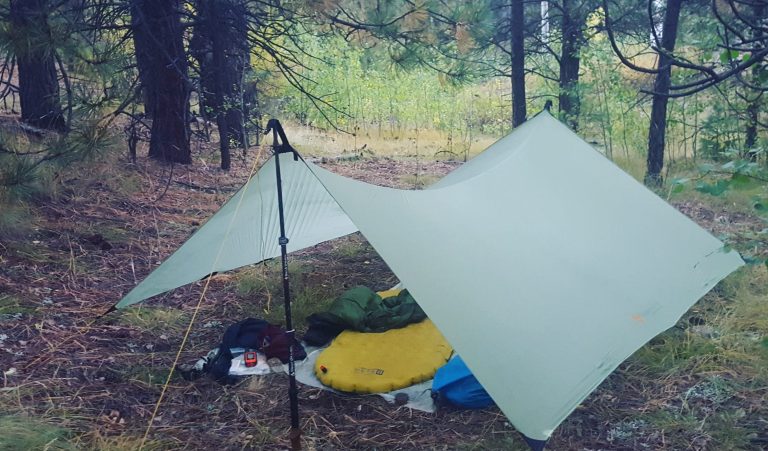
2. Shelter
The AT receives tons of rain. I would hazard a guess that roughly 70% of my hike was in the rain to some degree or another. It can be miserable. But having a lightweight and comfortable tent was a game changer. I used the Six Moon Designs Skyscape Trekker, which I loved. I found it nice to have a wide coverage from the rain. And this particular tent has two roll-back vestibules that turn it into a net-tent for pleasant nights.
I could probably make do with a tarp with all the experience I’ve accumulated since then. But for a beginner, I’d stick with a tent. Keep in mind, trail shelters will not always be vacant. I highly suggest learning to love sleeping in your tent. If I’m carrying it, I’m going to use it.
Options to consider:
Six Moon Designs Lunar Solo
Durston Gear X-Mid 1
Gossamer Gear The One
3. Sleeping Quilt
I’m a die-hard down sleeping quilt user. I’ve transitioned to using them after years of traditional sleeping bags, and I’ll probably never go back. For the AT, I used an Enlightened Equipment Revelation (10 degree). I think my temperature rating was a bit aggressive. A 20 degree would have probably sufficed, when paired with base layers. The AT can get really cold at night. I woke up in snow many times. It’s not a time to skimp on quality. Get yourself a nice setup if you can. I’m a firm believer that having quality sleep will improve your experience, and lighten your backpack if you choose wisely.
One very important note about down quilts: I made it my life purpose to keep it dry. Your backpack will get progressively more wet as time goes on without the sunshine, and so will your other gear. Soon, your dry quilt will be damp. Do whatever you can to keep it dry. Put it in it’s own trash bag and stuff it down inside your pack if you have to. And utilize the sunshine to dry your gear. I vividly remember the pain of fighting this battle.
Options to consider:
Enlightened Equipment Enigma
Zpacks Solo Quilt
Katabatic Gear Alsek Quilt
4. Sleeping Pad
In addition to a comfy quilt, I recommend a lightweight inflatable pad, though many also opt to use a foam pad. This one comes down to your personal preference. I know many people who can sleep fine on a foam pad. I’m not usually one of them. On the CDT I used one, but ended up switching back to an inflatable. But on the AT, I used a Therm-a-rest Neo Air. It lasted the entire trip. I was vigilant of its placement to avoid holes.
I like to view my pad as a supplement to the warmth of my quilt. It offers insulation from the cold ground, and on the AT where it often rains and snows, that can be a huge boost to comfort.
Options to consider:
Therm-a-rest Neo Air
Therm-a-Rest Z-Lite SOL
Nemo Tensor Trail
5. Rain Gear
No Appalachian Trail gear list is complete without rain gear. My particular year (2015) as I recall had a ton of rain. This is not unusual for the trail, and I’m sure lots of others can attest to this. At one point, in New England I didn’t have clear skies for about 2 weeks. For my hike, I used a Marmot Precip. These days, I use a Mont Bell Versalite. Either would do for an AT hike. A couple things I like to look for in a rain jacket are pit-zips to help reduce sweating inside the jacket, and roomy pockets that allow me to warm up my hands.

I also used a ULA Rain Skirt which I love. This is an ultralight alternative to rain pants that breathes much better, but still keeps the mass of your legs protected from cold rain.
Though there are a lot of options out there, one important thing to learn about rain gear is this: You’ll get wet either way. The rain gear is more or less meant to keep you warm and wet rather than cold and wet. You will sweat through it.
Options to consider:
OR Helium
Enlightened Equipment Visp
Marmot PrecipEco
6. Water Treatment
Water treatment on the AT is paramount with the amount of use the trail gets each year. Thankfully I never got sick from it. For all my water treatment, I used a Sawyer Squeeze. When I was on the trail, it was the most popular option out there. Today, there are some others, but the Sawyer is still my go-to. It’s great to have in my backpack because it’s light, simple, and effective.
Popular options for water treatment on the Appalachian Trail:
Sawyer Squeeze
Katadyn BeFree
Aquamira Water Treatment Drops
7. Footwear
Ultralight hiking has hastened the dawn of using running shoes for long distance hiking. I used to wear heavy duty boots, until one day they got wet and I never had dry boots again. Because I got rid of all my boots. The AT (again, beating a dead horse here) is very wet. Your feet will be crying out in misery if you wear waterproof boots. Many times, you have no choice but to trample through ankle deep mud, or puddles of water. Make sure your feet can breathe.
If your backpack is dialed in, you have every reason to use lightweight trail running shoes. Preferably mesh material that dries out easily. I used a whole range of shoes on the AT, but my favorite were my Altra Superiors. Nowadays, I tend to use something with a bit more cushion, such as the Altra Timp, or my LaSportiva Wildcats.
The AT is gruesome on shoes. Sharp rocks, relentless mud, rain, snow, etc. If I hiked today, I would probably take my Wildcats just for their sheer sturdy but lightweight feel. I was able to stretch about 800-900 miles out of a single pair on the CDT. That’s plenty of life in my opinion.
Options to consider:
Altra Lone Peak
Salomon S/Lab Ultra 3
LaSportiva Wildcat
Conclusion
You’re now armed with an Appalachian Trail gear list of essentials for an enjoyable and comfortable trip. Remember, it’s not just about the stuff in your backpack – it’s about the challenges too. You’ll look back and view them fondly. The enduring rain, the awful humidity, piranha like mosquitoes, etc. But bringing the right gear will help the challenges seem more manageable. Your gear will evolve as you do on the trail, so stay flexible. Most importantly, learn to love the trail!